
A rowing machine trains your legs, back, core, and arms in a single movem1ent. It burns calories efficiently while keeping joint stress low. Session quality depends almost entirely on technique.
A few principles, learned correctly from the start, make every session effective. Learned wrong, small errors compound into patterns that are much harder to undo.
The Four Phases of a Rowing Stroke
Every rowing stroke follows four phases. Each has a specific position, purpose, and sequence that determines how much power you actually generate.
The Catch
Knees bent, shins vertical, arms straight, spine neutral. Hips hinge forward at the crease, not at the lower back. Your quads are pre-loaded and ready to push.
The Drive
Legs push first. Hips swing back once the legs are nearly extended. Arms pull last.
Your legs generate roughly 60% of the power per stroke. Pulling with the arms early cuts that contribution short and shifts extra load onto the lower back.
The Finish
Legs fully extended. Torso leaned back to roughly the 11 o'clock position. Handle pulled to the lower chest, elbows drawn behind the torso.
The Recovery
Arms extend first, body leans forward, knees bend last. Recovery should take about twice as long as the drive.
That 2:1 ratio keeps each stroke deliberate and gives your body a real window to reset.
Recovery is preparation for the next drive, not a break from the last one. The slow return also loads your quads eccentrically, adding real training value over a full session.
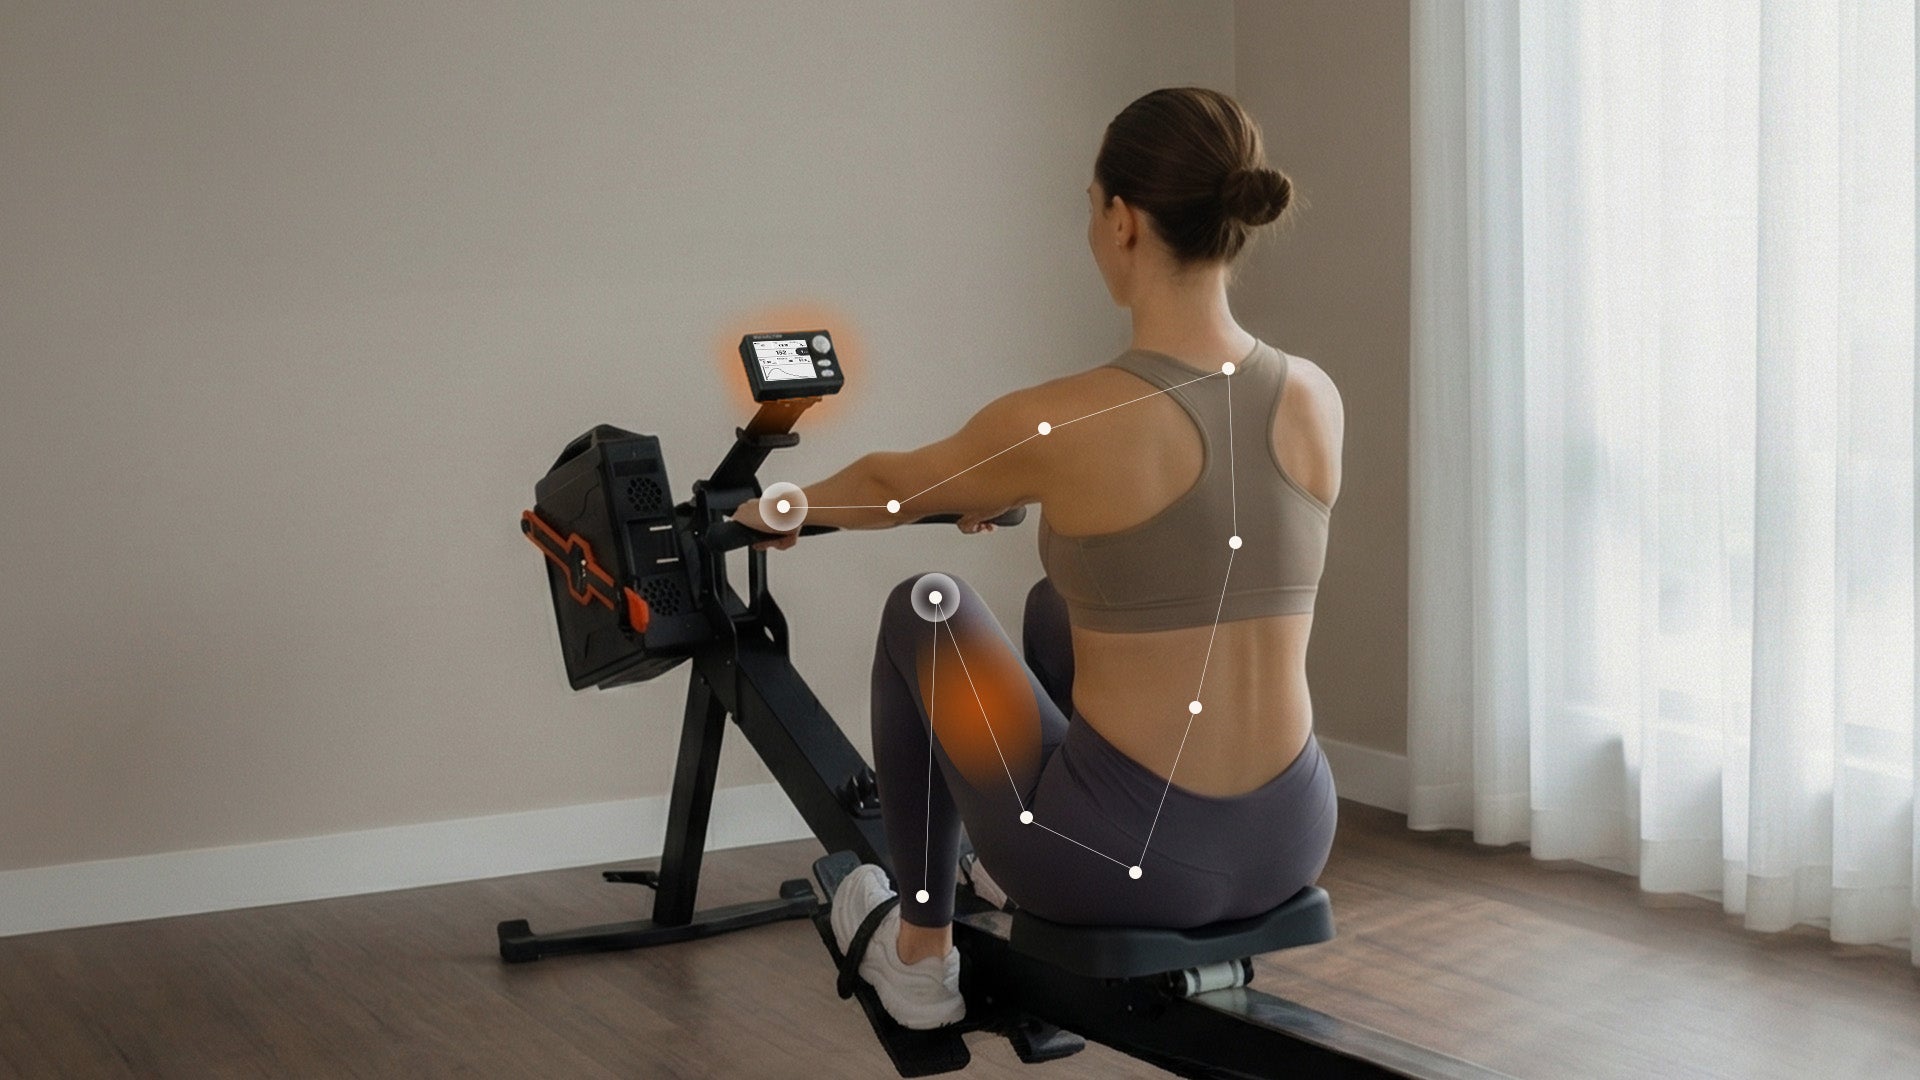
Knowing exactly which muscles a rowing machine works at each phase changes how you approach every stroke.

How to Set Up the Rowing Machine
Three settings directly affect how your technique functions. Wrong settings create form problems that look like skill problems.
Foot Strap Position
The strap should sit across the widest part of your foot, roughly over the ball. Too loose, your heel lifts during the drive and the force chain breaks.
Too tight, ankle flexion is restricted and catch depth suffers. Your heel can lift slightly at the catch, but your foot should stay on the footplate.
Damper Setting
On air machines, the damper controls how much air enters the flywheel. A higher setting makes strokes feel heavier. A lower setting feels lighter and allows more strokes per minute.
For most beginners, damper 3 to 5 is the right starting range. It lets you focus on technique without fighting the load.
Higher settings are not automatically harder training. A rower pulling hard at damper 4 generates more output than a rower going through the motions at damper 10.
On magnetic machines, resistance levels control load directly. The FitTransformer Sail offers air, water, and magnetic modes, each with 10 resistance levels to match any session goal.
Shin Angle at the Catch
At the catch, shins should be close to vertical. That angle allows the most efficient leg drive.
If shins push noticeably past vertical, the position is too compressed for effective force transfer. Adjust footplate height based on leg length if the machine allows it.
Five Rowing Mistakes That Beginners Make
Mistake 1: Arms Moving Too Early
At the start of the drive, elbows bend while the legs are still loaded. Leg power gets cut short, and the lower back picks up the extra load.
The fix: for the first few centimeters of every drive, keep your hands still. Push through the footplate first.
Mistake 2: Rounding the Lower Back at the Catch
As the seat slides forward, the lumbar spine curves under load. Across hundreds of strokes per session, that pattern leads directly to chronic lower back fatigue.
Shorten the catch position until the spine is neutral. A shorter catch with a neutral spine always outperforms a full catch with a rounded back.
Mistake 3: Recovering Too Fast
When recovery matches drive speed, there is no real rest between strokes. Fatigue builds fast and form breaks down sooner.
Count aloud: drive on "one," recover on "one, two." The 2:1 rhythm becomes automatic with repetition.
Mistake 4: Too Much Resistance Too Early
High resistance with poor technique forces compensation through the back and shoulders. The legs, which should generate most of the power, get bypassed.
Start at levels 3 to 5 on air machines. Let technique determine the load, and raise it gradually through progressive overload as form becomes consistent.
Mistake 5: Bent Wrists at the Finish
The wrists flip upward as the handle reaches the chest. This adds unnecessary tension through the forearms and reduces pulling efficiency.
Keep wrists flat. Grip the handle with the fingers, not the palm.

A Four-Week Plan for Complete Beginners
The first two weeks are about technique, not cardio output. High intensity with poor form builds incorrect patterns faster. Every session starts with five minutes of low-resistance technical rowing.
Week 1: Establish the Stroke Pattern
3 sessions, 15 to 20 minutes each
5 minutes of low-resistance technique work, then 10 minutes of continuous easy rowing.
- Resistance: levels 3 to 4 (air) or low (magnetic)
- No pace target. Correct drive sequence is the only goal.
- End check: 10 minutes of continuous rowing with consistent sequencing
Week 2: Add Interval Variation
3 sessions, 20 to 25 minutes each
2 minutes at moderate effort, 1 minute easy, repeated 6 to 7 rounds.
At the end of each moderate interval, check: are the arms still following the legs, or starting to lead?
Week 3: Build Aerobic Base
3 to 4 sessions, 25 to 30 minutes each
20 to 25 minutes of continuous rowing at low to moderate effort. Target 60 to 70% of maximum heart rate.
That puts you in Zone 2 aerobic training, the range that builds long-term cardiovascular capacity. Start tracking your 500-meter split pace and aim to hold it steady.
Week 4: Set a Benchmark
3 to 4 sessions
Row one timed 1,000-meter effort this week. General targets: under 5:00 for men, under 5:30 for women.
Continue other sessions in the Week 3 format. The FitTransformer Sail displays split time, distance, and duration in real time, making every target in this plan trackable.
How to Keep Improving After Your First Month
At the end of four weeks, completing 1,000 meters without stopping and holding a stable split pace for 20 minutes are realistic targets. That is a solid foundation.
Progress from there follows three paths depending on your goal.
Endurance Focus
Gradually extend continuous sessions from 20 minutes toward 30 and then 40. Retest 1,000-meter and 2,000-meter split pace every four weeks.
This path builds VO2 max and long-term cardiovascular capacity most directly.
Power Focus
Add four rounds of 500-meter sprints with full rest between rounds. Work to compress your split time gradually.
This develops anaerobic capacity and raw output.
Cross-Training Focus
Use rowing as active recovery between strength training days. Add one rowing interval session per week to keep aerobic fitness sharp.
Athletes preparing for HYROX competition typically use this cross-training structure as their default weekly setup.
One Pattern to Avoid
Training at the same intensity and duration every session is the most common reason progress stalls. Adaptation requires a change in stimulus.
Add duration, increase intensity, or raise frequency. Not all three at once.
Start Sail Today
Four phases. One sequencing rule: legs, then arms. A 2:1 recovery ratio. Get those right in month one, and every session after builds on a solid base.
The four-week plan above makes correct technique the default, well ahead of when intensity becomes the focus. The FitTransformer Sail tracks split time, stroke rate, and distance in real time. Visit FitTransformer.com to see how the Sail fits into your training.

FAQs
Q1: How long should a beginner row each session?
Start with 15 to 20 minutes in week 1. Increase to 25 to 30 minutes in weeks 2 and 3. After the first month, 30 to 45 minutes covers most fitness goals. Technique quality always takes priority over session length.
Q2: Is rowing good for weight loss?
Yes. A person around 155 pounds burns approximately 200 to 270 calories rowing at moderate intensity for 30 minutes. High-intensity intervals can reach 300 to 350 calories in the same window. Low joint impact makes high-frequency training realistic.
Q3: Can you use a rowing machine if you have lower back pain?
Not during an acute flare-up. For chronic, non-acute discomfort, low-resistance rowing with a neutral spine can strengthen the spinal stabilizers that most people underwork. Start at the lowest resistance. Anyone with a disc herniation history should consult a doctor first.
Q4: What is the difference between a high damper setting and a low one?
A high damper makes each stroke feel heavier and reduces stroke rate. A low damper feels lighter and allows faster strokes. Training intensity depends on power per stroke, not damper number. Beginners should start between damper 3 and 5.